Grinding & Shaping · Grind
Angle Grinder
An angle grinder spins a cutting or grinding disc for fast, rough work on metal. It cuts stock, strips scale, and roughs in profiles before the belt grinder refines them, and it demands a guard and a face shield.
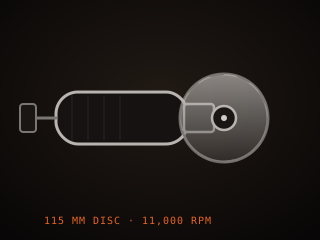
Specifications
| Disc size | 115–180 mm (4.5–7 in) |
|---|---|
| Speed | Fixed or variable |
| Discs | Cut, grind, flap, wire |
| Power | 700–2,000 W |
| Guard | Fitted, never removed |
| Use | Cutting, scale removal, roughing |
Technical parameters
| Rated speed | 8,500–11,000 RPM |
|---|---|
| Noise level | 95–105 dB |
| Cutting disc thickness | 1–3 mm |
| Grinding disc thickness | 6 mm |
| Arbor size | 22.2 mm |
| Spindle thread | M14 common |
| Disc max speed | Must exceed grinder RPM |
| Vibration | High, use anti-vibration grip |
Overview
An angle grinder is a handheld power tool that spins a disc at high speed, used for cutting bar stock, rough grinding, and stripping scale. In a knife shop it is the fast, crude tool: it cuts a billet to length, knocks the mill scale off stock, and roughs in a profile before the belt grinder refines it. The disc choices are important. Thin cutting discs slice, thick grinding discs remove material, flap discs blend and finish, and wire wheels strip rust and scale. Each disc has its own speed rating, and using the wrong one is dangerous.
When choosing, match the disc diameter and the power of the grinder to the work, and always respect the RPM rating stamped on the disc. A 115 or 125 millimeter grinder is the common all-round size, while a larger 180 millimeter machine cuts deeper and heavier. Variable speed helps when using flap discs and wire wheels, which can be run too fast. The guard is not optional: it catches fragments if a disc shatters and shields your hand. Handle vibration, noise, and dust are the three things that make this tool tiring and hazardous, so grip and PPE matter.
In the workflow the angle grinder is a shortcut for rough work, not a finishing tool. It cuts stock to length, removes scale, and takes off the worst of the forge marks so the belt grinder has less to do. It is also used for cutting hardened steel where a belt would struggle, though the heat it generates must be managed. Because it removes metal aggressively and throws sparks in a wide arc, it is best used before heat treatment, on rough stock, and with the work clamped down. The belt grinder then brings the shape to final tolerance.
Where it fits
This tool belongs to the Grind stage of the build.
Safety
- Wear a full face shield, not just glasses, since a shattered cutting disc throws fragments at high speed.
- Never remove the guard or over-speed a disc; check the disc RPM rating exceeds the grinder before you fit it.
- Clamp the work and keep both hands on the tool, because kickback from a pinched disc can jerk the grinder out of your grip.
Using it well
- Match the disc to the job: thin cut-off wheels slice, thick grinding discs hog, and flap discs blend and finish.
- Let the disc cut at its own pace; forcing it overheats the steel and loads the wheel, which is what causes most kickback.
- Use it before heat treatment on rough stock, and leave final shaping to the belt grinder where you control the heat.
- Check the disc for cracks and its expiry date before fitting, and run a new disc for a few seconds before applying load.
Compatible steels
Steels this tool is commonly used with, and which suit its working range.
Related processes
Related tools
Sanding Belts
Abrasive belts in a grit progression for grinding and finishing.
Belt Grinder
Motorized abrasive belt machine for shaping and finishing blades.
Metal Files
Hand-cutting tools for shaping steel and refining bevels.
Coal Forge
Solid-fuel hearth that burns coal or coke for traditional forging.
Further reading

How to Start Knife Making: A Beginner’s Guide
Knife making rewards patience more than tools. Here is the honest starting path: one simple steel, a handful of files, and the three skills that actually decide whether your first blade works.

Handle Assembly: Materials, Pins, and Finish
A handle is where the knife meets your hand and the part people notice first. This covers materials, tang prep, epoxy, pins and bolts, and the finishing steps that make it feel like one piece.

Making a Leather Sheath: Step by Step
A sheath is a fitted leather case made around the knife, not a pouch the knife is dropped into. This walks through the pattern, the welt, wet forming and the stitching that holds it together.