Grinding & Shaping · Grind
Metal Files
Metal files cut steel by shaving small chips and still shape plunge lines, shoulders, and bevels with full control. They generate no grinding heat, and a file that bites into steel also proves the blade is still soft.
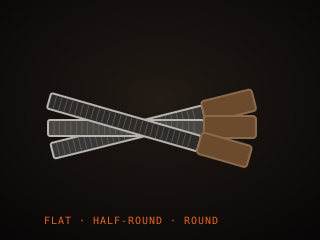
Specifications
| Cut | Bastard, second cut, smooth |
|---|---|
| Shape | Flat, half-round, round, triangular |
| Length | 100–350 mm |
| Steel | High-carbon, hardened |
| Handle | Fitted, for safety and grip |
| Use | Shaping, draw filing, testing |
Technical parameters
| Hardness | 60–66 HRC |
|---|---|
| Tooth pattern | Single or double cut |
| Cut length | 100–350 mm |
| Bite test | Slides on hardened steel |
| Steel cut | Soft, annealed stock |
| Cleaning | File card or wire brush |
| Draw filing | Sideways stroke, flat finish |
| Life | Wears with use, consumable |
Overview
A metal file is a hardened steel bar covered in teeth that cut by shaving away small chips. In bladesmithing, files still earn their place even in a shop full of power tools: they shape the plunge line, true up a ricasso, refine a bevel without generating dangerous heat, and set a crisp shoulder. Files come in different cuts, from coarse bastard through second cut to fine smooth, and in different shapes, flat, half-round, round, and triangular. Cut length, from about 100 to 350 millimeters, sets how much you can work at once.
When choosing, think about cut, shape, and how the file will be used. A coarse file removes metal quickly on soft, annealed steel, while a fine file smooths and leaves a scratch pattern that is easy to sand out. A file card keeps the teeth clear, because a file pinned with soft steel and chips stops cutting and starts sliding. Files are consumable: they wear, and a worn file polishes rather than cuts, so most smiths keep a few in good condition and retire the rest. A handle is not optional, since a bare tang can drive into your palm.
In the workflow files sit between the forge and the belt grinder, or replace the grinder entirely for smiths who work with hand tools. After normalizing, a file will cut annealed steel cleanly and let you establish the profile and bevels with full control and no heat risk. Many makers still file the plunge line and the transition by hand because the control is better than any machine. Draw filing, pushing the file sideways along the work, produces a very flat surface. A file is also the honest test of hardness: if it bites, the steel is still soft.
Where it fits
This tool belongs to the Grind stage of the build.
Safety
- Fit a handle to every file; a bare tang can drive into your hand if the file slips or the work shifts.
- Wear eye protection and clamp the work, since a file can slip suddenly and throw your hand into a sharp edge.
- Clean files away from your lungs; blow or brush filings into a bin rather than sweeping dust into the air.
Using it well
- Draw file by pushing the file sideways along the work to cut a very flat surface and blend the bevels cleanly.
- Keep the teeth clear with a file card; a file pinned with soft steel stops cutting and starts skidding across the surface.
- Use the file as a hardness check: if it bites into the steel, the blade is still soft and not ready to temper.
- Reserve a fine file for the plunge line and shoulders, where crisp control matters more than speed of removal.
Compatible steels
Steels this tool is commonly used with, and which suit its working range.
Related processes
Related tools
Whetstones
Sharpening stones that grind and polish a blade edge by hand.
Sanding Belts
Abrasive belts in a grit progression for grinding and finishing.
Angle Grinder
Handheld power tool for cutting and rough grinding metal.
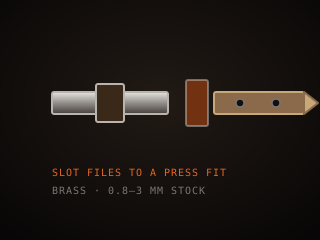
Brass Guard
Metal fitting between blade and handle that protects the hand.
Further reading

How to Start Knife Making: A Beginner’s Guide
Knife making rewards patience more than tools. Here is the honest starting path: one simple steel, a handful of files, and the three skills that actually decide whether your first blade works.

Handle Assembly: Materials, Pins, and Finish
A handle is where the knife meets your hand and the part people notice first. This covers materials, tang prep, epoxy, pins and bolts, and the finishing steps that make it feel like one piece.

Making a Leather Sheath: Step by Step
A sheath is a fitted leather case made around the knife, not a pouch the knife is dropped into. This walks through the pattern, the welt, wet forming and the stitching that holds it together.