Grinding & Shaping · Grind
Sanding Belts
Sanding belts are the abrasive loops a belt grinder runs, graded from coarse hogging grits to fine finishing grits. Choosing the right abrasive and stepping through the grits controls both the finish and how much heat reaches the steel.
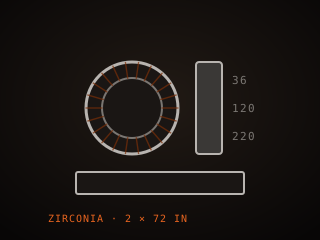
Specifications
| Grit range | 36–600+ |
|---|---|
| Abrasive | Aluminum oxide, zirconia, ceramic |
| Backing | Stiff or flexible cloth |
| Size | 50 × 2000 mm common |
| Joint | Butt or lap splice |
| Use | Profiling through finishing |
Technical parameters
| Common grits | 36 / 60 / 120 / 220 / 400 |
|---|---|
| Abrasive types | Aluminum oxide, zirconia, ceramic |
| Belt speed | 1,750–3,450 SFPM |
| Backing weight | X, Y, or J cloth |
| Grit size | 36–600 grit |
| Joint type | Butt joint preferred |
| Life | Dulls and glazes with heat |
| Cooling | Dunk work to control heat |
Overview
Sanding belts are the abrasive consumable that a belt grinder runs. Each belt is a loop of backing material coated with abrasive grit, and the grit, backing, and joint determine how it cuts. Low grits, from 36 to 80, remove metal fast and are used for profiling and bevels. Middle grits, 120 to 220, refine the grind and remove the deep scratches from coarse belts. Fine grits, 400 and up, prepare for polishing. The abrasive itself matters too: aluminum oxide is the general-purpose choice, zirconia cuts faster and lasts longer on steel, and ceramic belts are the most aggressive and longest-lived.
When choosing, match the belt to the steel, the task, and the speed. Coarse ceramic belts hog off annealed steel, while a fine aluminum oxide belt smooths and blends. The backing stiffness changes the cut: a stiff backing holds a crisp flat, while a flexible backing conforms to curves. The joint is a common failure point, so a well-made butt joint keeps the belt running smoothly. Belts are consumable and wear out, and a dull, glazed belt generates heat and polishes rather than cutting, so replacing a worn belt early is usually faster and safer than pressing on.
In the workflow sanding belts carry the blade from rough forging to a finished surface. The progression usually starts coarse to establish bevels, steps through middle grits to remove scratches, and finishes fine before polishing or etching. Skipping grits is a false economy, because a 220 belt cannot easily erase the scratches left by a 60. Because the belt runs fast and generates heat, especially at fine grits, the operator must keep the blade moving and dunk it in water often after heat treatment. Belt choice is one of the biggest levers on both finish quality and how long a blade takes to make.
Where it fits
This tool belongs to the Grind stage of the build.
Safety
- Wear a respirator and eye protection; sanding belts throw fine metal and abrasive dust that damages lungs over time.
- Check belts for tears and correct tracking before loading the machine, since a torn belt can burst and whip at speed.
- Keep fingers clear of the contact wheel and platen; a belt can grab a glove or a sleeve and pull your hand in.
Using it well
- Step through the grits and do not skip; a 220 belt cannot erase the deep scratches a 60 belt leaves behind.
- Change a glazed or dull belt early; a worn belt polishes and heats the steel instead of cutting it.
- Grind on fresh belts at moderate pressure and keep the blade moving so heat does not build in one spot.
- Keep a water bucket at the grinder and dunk after heat treatment to protect the temper from grinding heat.
Compatible steels
Steels this tool is commonly used with, and which suit its working range.
Related processes
Related tools
Metal Files
Hand-cutting tools for shaping steel and refining bevels.
Angle Grinder
Handheld power tool for cutting and rough grinding metal.
Whetstones
Sharpening stones that grind and polish a blade edge by hand.
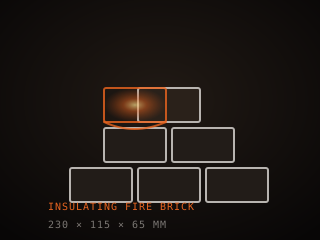
Fire Bricks
Heat-resistant bricks that line, insulate, and shape a forge chamber.
Further reading

How to Start Knife Making: A Beginner’s Guide
Knife making rewards patience more than tools. Here is the honest starting path: one simple steel, a handful of files, and the three skills that actually decide whether your first blade works.

Handle Assembly: Materials, Pins, and Finish
A handle is where the knife meets your hand and the part people notice first. This covers materials, tang prep, epoxy, pins and bolts, and the finishing steps that make it feel like one piece.

Making a Leather Sheath: Step by Step
A sheath is a fitted leather case made around the knife, not a pouch the knife is dropped into. This walks through the pattern, the welt, wet forming and the stitching that holds it together.