Grinding & Shaping · Grind
Belt Grinder
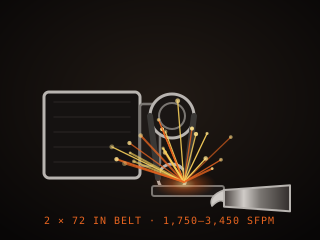
A belt grinder runs an abrasive belt over a platen and contact wheels to shape, bevel, and finish blades. Variable speed and good tracking make it the central power tool in a modern knife shop, handling work that files once did.
Specifications
| Belt size | 50 × 2000 mm (2 × 72 in) |
|---|---|
| Drive | Variable-speed motor |
| Platen | Flat, plus contact wheels |
| Tracking | Adjustable, belt stays centered |
| Work rest | Adjustable tool rest |
| Use | Profiling, bevels, finishing |
Technical parameters
| Belt speed | 1,750–3,450 SFPM |
|---|---|
| Motor power | 0.75–2.2 kW (1–3 hp) |
| Contact wheel size | 50–350 mm |
| Platen width | 50–75 mm |
| Common grits | 36–400+ |
| Tracking tolerance | Within a few mm |
| Dust port | Recommended, for metal dust |
| Belt change | Tool-free on most models |
Overview
A belt grinder runs a continuous abrasive belt over a set of contact wheels and a platen, driven by an electric motor. It is the single most important power tool in a modern knife shop because it does the bulk of the work that used to be done by files: profiling, bevel grinding, surface cleanup, and sharpening. The belt travels at high speed and the operator presents the steel against the platen or a contact wheel, so material removal is fast and controllable. Belt grinders built for knifemaking usually run a 50 by 2000 millimeter belt and offer variable speed.
When choosing, the key features are belt speed control, the platen and wheel setup, and the tracking system. Variable speed lets you run slow for heat-sensitive work and fast for hogging. A flat platen gives crisp bevels and flat grinds, while a large contact wheel hollows the grind and a small wheel tightens radii. Good tracking keeps the belt centered under load, and a quick tool rest and adjustable work height make long sessions far less tiring. Motor power matters too: a weak motor bogs down and burns belts, while a strong one removes metal without stalling.
In the workflow the belt grinder bridges forging and heat treatment. After the forge sets the rough profile, the grinder refines the shape, establishes the bevels, and prepares the surface for heat treatment; after hardening and tempering it cleans up the blade and sets the final edge. Because it generates heat fast, it is also where beginners ruin temper: grinding a thin, hardened edge until it turns straw or blue will soften the very edge they worked to harden. Learning to grind cool, with fresh belts and light pressure, is a core skill.
Where it fits
This tool belongs to the Grind stage of the build.
Safety
- Wear a respirator and eye protection; belt grinding throws fine metal and abrasive dust that is a real inhalation hazard.
- Check the belt for tears and the tracking before starting, because a torn belt can burst and whip at high speed.
- Never grind aluminum or other soft metals on a belt used for steel without cleaning, since mixed dust can ignite.
Using it well
- Grind with fresh, sharp belts and light pressure; a dull belt generates heat and polishes instead of cutting.
- Keep a container of water nearby and dunk the blade often, especially after hardening, so you do not draw the temper.
- Set the tool rest and platen square to the belt and check tracking under load, not just at idle speed.
- Collect metal dust at the source and empty the container often, since fine steel and aluminum dust is a fire risk.
Compatible steels
Steels this tool is commonly used with, and which suit its working range.
Related processes
Related tools
Angle Grinder
Handheld power tool for cutting and rough grinding metal.
Blacksmith Hammer
Primary striking tool for moving hot steel on the anvil.
Anvil
Massive steel block that provides the reaction surface for hammering.
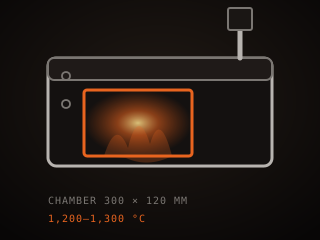
Gas Forge
Propane-fired chamber for bringing steel to forging temperature.
Further reading

How to Start Knife Making: A Beginner’s Guide
Knife making rewards patience more than tools. Here is the honest starting path: one simple steel, a handful of files, and the three skills that actually decide whether your first blade works.

Handle Assembly: Materials, Pins, and Finish
A handle is where the knife meets your hand and the part people notice first. This covers materials, tang prep, epoxy, pins and bolts, and the finishing steps that make it feel like one piece.

Making a Leather Sheath: Step by Step
A sheath is a fitted leather case made around the knife, not a pouch the knife is dropped into. This walks through the pattern, the welt, wet forming and the stitching that holds it together.