
Most people who want to make knives start by buying things. A grinder, a forge, a stack of belts, a bar of exotic steel. Then they make one blade, hit a problem they cannot diagnose, and the gear sits in the corner. The makers who keep going almost always do the opposite: they start with a single simple steel, a small number of hand tools, and a project they can finish in a weekend. Everything else gets added once they know why they need it.
Knife making is three separate crafts stacked on top of each other. Shaping metal is one. Controlling heat is another. Putting a sharp, durable edge on the result is the third, and it is the one beginners underestimate most. A blade that is shaped beautifully but heat treated badly is a decoration. A blade with an ugly grind but correct hardness will still cut for years. Learn them in that order and your failures stay cheap.
What you actually need before you buy anything
You can make a complete, functional knife with a hacksaw, a set of files, a drill, sandpaper, and some way to heat steel. That is not a compromise — it is the fastest way to learn, because every cut is slow enough that you can see what is happening. Power tools hide mistakes by making them quickly, and a beginner who has never felt a file skate across a hardened edge has no idea what they are looking at.
The tools worth buying early are the ones that solve a problem you already have. A small belt grinder speeds up profiling enormously once you have filed two blades by hand and understand what the abrasive is doing. A respirator matters the first time you grind, not the tenth. A set of needle files costs very little and does work no grinder can reach.
- A rigid work surface at waist height, with a vise you can lean into without the bench moving.
- A drill or drill press, plus 3 mm, 4 mm and 6 mm bits for pin and handle holes.
- A flat file, a half-round file and a set of needle files. Files cut steel; sandpaper mostly polishes it.
- Wet-or-dry sandpaper from 120 to 800 grit, used with a hard backing block rather than your fingers.
- Eye protection, a P2 or P3 respirator and hearing protection. Buy these before the grinder, not after.
Stock removal or forging
Stock removal means cutting a knife shape out of flat bar and grinding the bevels in. Forging means heating steel and moving it with a hammer, then refining what you moved. Both end at the same place, and most working smiths do some of each depending on the knife. The choice is really about which set of skills you want to spend your evenings building.
Neither route is more legitimate. A forged blade is not automatically better than a ground one, and a ground blade is not automatically more precise. What matters is that the finished knife has good geometry, correct hardness and a clean apex. Pick the route whose failures you can diagnose.
| Stock removal | Forging | |
|---|---|---|
| Starting cost | Low | Higher |
| Space needed | A bench | Ventilated shop |
| Core skills | Grinding, finishing | Heat, hammer control |
| Steel waste | More | Less |
| Time to first knife | Days | Weeks |
| Best starting steel | Any flat bar | Simple carbon |
Your first steel should be 1084
1084 is the standard recommendation for a first knife, and the reason is not that it is the best steel available. It is the most forgiving. It is a simple high-carbon steel with enough manganese to harden in fast oil, it forges and grinds predictably, and its hardening window is wide enough that a beginner with a modest forge can hit it.
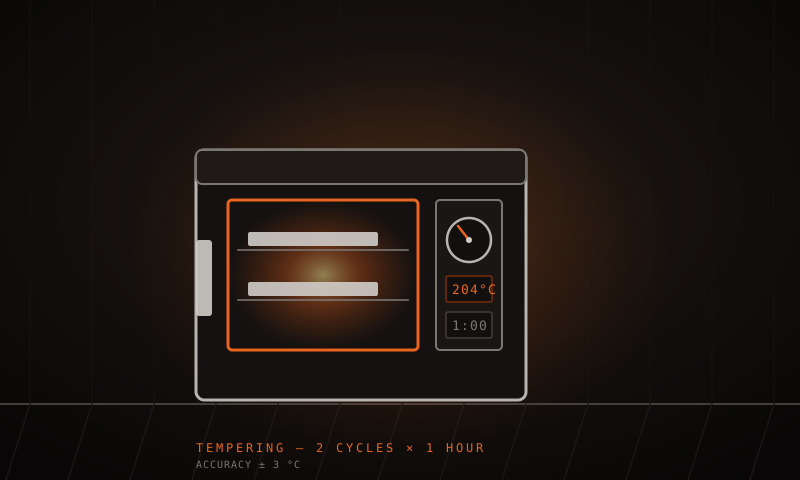
The working numbers: austenitize 1084 at 800–830 °C, quench in fast oil, then temper twice at 200–230 °C for about one hour per cycle to land around 58–60 HRC. That is a hard, keen edge that still survives reasonable use. If you miss the temperature by twenty degrees you will probably still get a usable blade, which is exactly what you want while you are learning the motions.
Avoid mystery steel for now. Leaf springs, old files and bearings can make good knives, but you do not know their carbon content or their hardenability. When a blade comes out soft you cannot tell whether your process was wrong or the steel was, and that uncertainty is what stalls beginners.
The three skills you are actually learning
It helps to know what you are actually practicing, because beginners often think they are learning one thing when they are learning another. Shaping, controlling heat and sharpening are separate skills that improve at different rates. You can be good at two of them and still make a knife that disappoints, and knowing which one let you down is how you get better instead of just repeating the same result.
Shaping
Getting a flat, even surface with a file or a belt. This is muscle memory: the angle of your wrist, the pressure of your push, the moment the abrasive loads up. Expect your first three profiles to be visibly uneven.
Reading heat
Learning what 800 °C looks like in your shop, under your lighting, with your steel. Color is a guide, not a measurement, and shop light changes it. This skill decides whether your blade hardens at all.
Sharpening
Forming a consistent apex at a controlled angle. A knife that is shaped and hardened but badly sharpened will feel worse than a cheap kitchen knife, and that is a sharpening problem, not a steel problem.
A realistic first project
Pick a small, simple knife: a 90–110 mm drop point, or a kiridashi-style utility blade. Short blades are easier to keep flat, easier to heat evenly and easier to sharpen. A 250 mm bowie as a first project means fighting three problems at once, and you will not be able to tell which one is beating you.
Work in this order and do not skip forward. Profile the outline, drill your pin holes before heat treatment while the steel is still soft, file or grind the bevels, then harden and temper, then finish the bevels and sharpen. Drilling after hardening is a bad experience you only need to have once.
Draw and cut the profile
Scribe the outline on flat bar with a marker, cut 2–3 mm outside the line, then file back to it. Leave the scribed line visible until the last pass so you can always see where you are.
Drill the holes
Drill pin holes while the steel is soft. Use a center punch, a little cutting fluid and a slow speed. Oversize by 0.1–0.2 mm so pins still fit after heat treatment scale is cleaned off.
Grind or file the bevels
Aim for roughly 15° per side on a kitchen knife and 20° per side on a general outdoor knife. Keep the grind lines even and stop before the edge gets thin — a razor edge before hardening will warp or burn.
Harden and temper
Heat to 800–830 °C, quench in fast oil, then run two one-hour tempers at 200–230 °C. Do not skip the tempering. An untempered blade is brittle and can crack in the handle later.
Finish and sharpen
Clean the scale off, take the bevels to a fine finish, then sharpen on stones. A 1000 grit stone sets the apex, and 4000 and 8000 grit refine it without removing much metal.
Where beginners actually go wrong
The same handful of mistakes shows up over and over, and almost none of them are about talent. They are about sequence and about expectations. If you know them in advance you can avoid most of the wasted steel and the frustration that comes with it. Every item below is something a competent maker has done at least once, which is exactly why they are worth writing down before you start.
- Chasing a hardness number instead of a usable edge. A 62 HRC blade that chips is worse than a 58 HRC blade that holds.
- Grinding the edge too thin before heat treatment, so it warps, cracks or burns during the quench.
- Skipping the temper, or tempering once for twenty minutes instead of twice for a full hour.
- Trusting the magnet. Steel loses magnetism near 770 °C, which is below the hardening temperature you need.
- Finishing the handle before the blade is heat treated, then finding the blade still needs more grinding.
Key takeaways
- Start with 1084 flat bar, files and sandpaper. Add power tools only when a specific problem demands them.
- Austenitize 1084 at 800–830 °C, quench in fast oil, and temper twice at 200–230 °C for about 58–60 HRC.
- Profile, drill, bevel, harden, then finish and sharpen. Doing steps out of order causes most beginner failures.
- The magnet trick only tells you the steel is near 770 °C, which is cooler than the hardening temperature you need.
- Choose a short, simple first knife. Small blades are easier to heat evenly, keep flat and sharpen well.
Frequently asked
Yes. Stock removal only needs a way to harden the finished blade. A small gas forge, or even a torch and a stack of firebricks, can reach 800–830 °C on a short blade. You do not need to forge to make a good knife. Plenty of respected makers grind every blade from flat bar and never pick up a hammer.
Around 58–60 HRC is the sweet spot for a first carbon steel blade. It takes a keen edge, holds it reasonably, and is forgiving of small mistakes in sharpening and in use. Chasing 62 HRC on 1084 usually means a shorter or cooler temper and a more brittle edge that chips instead of rolling.
Usually not, if you bought annealed flat bar and only cut and ground it cold. Normalizing matters when you have forged the steel, because hammering leaves internal stresses and coarse grain. Forged blades should be normalized three times before hardening, and that also reduces the chance of warping in the quench.
Related articles
Understanding Steel: Carbon, Alloy, and Tool Steels
Carbon content decides whether steel can harden at all. Alloying elements decide how it behaves while you work it. Knowing the difference is what lets you choose a steel instead of guessing at one.
Setting Up a Home Forge
Where you put the forge matters more than which forge you buy. This covers siting and ventilation, gas versus coal, anvils and stands, tooling, quench setup and a layout that works in a small shop.
Blade Grinding: From Profiling to Sharpening
Grinding is where a knife is won or lost. This covers belt selection and grit progression, setting bevels and plunge lines cleanly, and taking an edge from a 36 grit belt all the way to an 8000 grit stone.