Forge & Heating · Forge
Forge Blower
A forge blower pushes air into a solid-fuel fire so it reaches forging and welding heat. Hand-crank and electric blowers both work, and the blast is the main lever on temperature, fuel use, and how fast the fire responds.
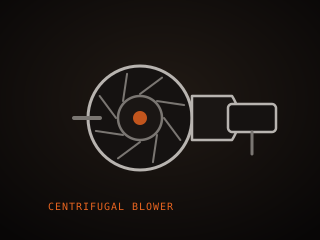
Specifications
| Drive | Hand crank or electric motor |
|---|---|
| Air control | Damper, rheostat, or crank speed |
| Housing | Cast iron, steel, or alloy |
| Airflow | Low pressure, high volume |
| Mounting | Bolted to forge or bench |
| Ducting | Pipe or cast tuyere to firepot |
Technical parameters
| Airflow range | 0–8 m³/min |
|---|---|
| Static pressure | Low, typically under 1 kPa |
| Motor power | 40–250 W electric |
| Crank ratio | 2:1 to 5:1 gearing |
| Outlet diameter | 50–100 mm |
| Housing temperature | Stays below 80 °C |
| Duty cycle | Continuous with cooling |
| Noise | Quiet hand crank, 60–80 dB electric |
Overview
A forge blower supplies the blast of air that a coal or coke fire needs to reach forging and welding temperatures. Without forced air, solid fuel burns slowly and only reaches a dull red; with a steady blast, the same fuel produces a tight, white-hot hot spot. Blowers range from hand-cranked fans driven through a gearbox to small electric centrifugal fans with a speed control. The hand crank gives fine, immediate control and works with no power, while an electric blower is easier on long sessions and holds a steady blast.
Choosing a blower is mostly about matching air volume to firepot size and about how you will control it. A blower that is too large blows the fire apart, throws fuel and sparks, and burns through coal at a frantic rate; one that is too small cannot push the fire past a certain temperature. Adjustable blast, either by a damper, a rheostat, or simply how fast you crank, is the key feature. Cast-iron or steel housings survive heat and grit better than plastic, and a removable inlet makes it easier to clear dust and ash.
In the workflow the blower sits between you and the fire, and it is the main lever on temperature. More air means a hotter, faster fire and more scaling on the steel; less air means a slower, gentler heat that is easier to control and wastes less fuel. Learning to feather the blast, opening it while the steel is out and easing it back while you work, is a core solid-fuel skill. Keep the blower and its ducting clear of ash and clinker, because a partly blocked air path gives an uneven blast and a wandering hot spot.
Where it fits
This tool belongs to the Forge stage of the build.
Safety
- Guard the inlet and any belt or gear drive so fingers, sleeves, and loose clothing cannot be caught by the fan.
- Never blow air across dry coal dust or ash; a dust cloud from a blower can ignite and flash across the shop.
- Shut the blast off before you leave the forge, since a live fire with full air can flare and spread sparks quickly.
Using it well
- Feather the blast: open it while the steel is in the fire and ease it back while you work, so you do not burn fuel or overheat the steel.
- Keep the tuyere and air duct clear of clinker and ash, since a partly blocked path gives an uneven blast and a wandering hot spot.
- Fit a simple damper or gate in the duct so you can cut the blast instantly without reaching for the power switch.
- Listen to the fire: a steady roar means a healthy blast, while a hiss or a sputter usually points to a clogged grate or wet fuel.
Compatible steels
Steels this tool is commonly used with, and which suit its working range.
Related processes
Related tools
Crucible
Heat-resistant vessel for melting metal in a foundry or forge.
Forge Burner
Mixes fuel and air to produce the flame that heats a forge chamber.
Polishing Wheel
Soft buffing wheel that brings steel to a mirror finish.
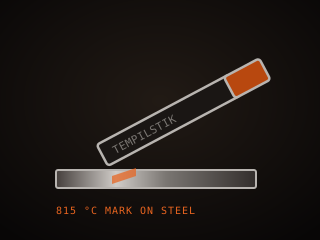
Tempilstik
Crayon that melts at a set temperature to confirm steel heat.
Further reading

How to Start Knife Making: A Beginner’s Guide
Knife making rewards patience more than tools. Here is the honest starting path: one simple steel, a handful of files, and the three skills that actually decide whether your first blade works.

Handle Assembly: Materials, Pins, and Finish
A handle is where the knife meets your hand and the part people notice first. This covers materials, tang prep, epoxy, pins and bolts, and the finishing steps that make it feel like one piece.

Making a Leather Sheath: Step by Step
A sheath is a fitted leather case made around the knife, not a pouch the knife is dropped into. This walks through the pattern, the welt, wet forming and the stitching that holds it together.