Forge & Heating · Forge
Crucible
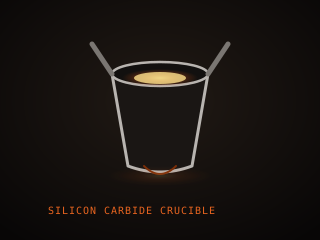
A crucible is a refractory vessel used to melt steel or non-ferrous metal for casting and ingot work. It must resist the melt, survive thermal cycling, and pour cleanly, and it is a consumable that wears thinner with every use.
Specifications
| Material | Clay-graphite or silicon carbide |
|---|---|
| Capacity | 0.5–5 kg of metal |
| Shape | Cup with pouring lip |
| Use | Melting steel or non-ferrous metal |
| Furnace | Crucible or foundry furnace |
| Consumable | Yes, walls thin with use |
Technical parameters
| Max temperature | 1,400–1,600 °C / 2,550–2,900 °F |
|---|---|
| Melt range | Brass ~900 °C, steel ~1,400 °C |
| Heating rate | Slow, 20–40 minutes |
| Wall thickness | 10–25 mm |
| Thermal shock | Low tolerance, preheat |
| Glaze condition | Indicates remaining life |
| Pour temperature | 50–100 °C above melt |
| Typical life | 10–50 melts by alloy |
Overview
A crucible is a cup-shaped refractory vessel used to melt metal. In a bladesmithing context it appears in two places: melting clean steel or iron for crucible steel and pattern-welded billets, and melting non-ferrous metals such as brass or bronze for guards and fittings. The crucible must hold molten metal without reacting with it, survive rapid heating and cooling, and let you pour cleanly. Clay-graphite crucibles are the common general-purpose type, silicon-carbide crucibles resist certain alloys better, and clay crucibles suit clean melts.
Choosing a crucible is about the metal, the furnace, and the pour. The material must be compatible with what you melt, since some slags and alloys attack the crucible wall and shorten its life. The size should match the melt, because an oversized crucible wastes heat and an undersized one forces a second pour. Shape matters too: a crucible with a pouring lip lets you direct the stream, while a round one needs a steady hand. Crucibles are also consumable, so you learn to read the glaze, the cracks, and the thinning walls that say it is time to retire one.
In the workflow, the crucible is a specialist tool rather than a daily one, and it belongs to the melting side of the craft. It is used with a dedicated furnace, tongs made for the crucible, and a mold or ingot form. The critical discipline is moisture control: any dampness in the crucible, the mold, or the metal can flash to steam under molten metal and drive an explosive spray. Preheat everything, keep the pour area dry, and never add cold, damp metal to a hot melt. Crucible work rewards patience and punishes shortcuts more than any other part of bladesmithing.
Where it fits
This tool belongs to the Forge stage of the build.
Safety
- Preheat the crucible and dry all metal before melting; trapped moisture flashes to steam and can blow molten metal out of the pot.
- Wear a face shield, leather apron, and spats, and pour over a dry, non-flammable floor; molten metal spatter causes deep burns.
- Use crucible tongs that grip the full body, and never carry a full crucible over yourself or anyone else.
Using it well
- Heat a new crucible slowly through its first firing, since a fast ramp cracks the glaze and shortens its working life.
- Keep a dedicated set of crucible tongs and a dry ingot mold; a wet mold is one of the most common causes of a steam explosion.
- Avoid letting a crucible freeze with metal inside it, and reheat slowly if it does, because a stuck ingot can crack the pot.
- Scrap metal for a melt should be clean and dry; painted, galvanized, or damp scrap can fume or spatter violently.
Compatible steels
Steels this tool is commonly used with, and which suit its working range.
Related processes
Related tools
Forge Blower
Moves air into a solid-fuel fire to raise and control its heat.
Forge Burner
Mixes fuel and air to produce the flame that heats a forge chamber.
Polishing Wheel
Soft buffing wheel that brings steel to a mirror finish.
Tempilstik
Crayon that melts at a set temperature to confirm steel heat.
Further reading

How to Start Knife Making: A Beginner’s Guide
Knife making rewards patience more than tools. Here is the honest starting path: one simple steel, a handful of files, and the three skills that actually decide whether your first blade works.

Handle Assembly: Materials, Pins, and Finish
A handle is where the knife meets your hand and the part people notice first. This covers materials, tang prep, epoxy, pins and bolts, and the finishing steps that make it feel like one piece.

Making a Leather Sheath: Step by Step
A sheath is a fitted leather case made around the knife, not a pouch the knife is dropped into. This walks through the pattern, the welt, wet forming and the stitching that holds it together.