Heat Treatment · Heat Treat
Tempilstik
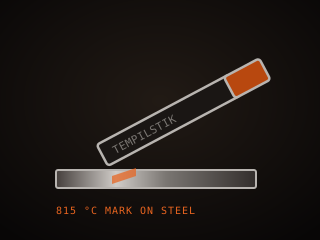
A Tempilstik is a crayon that melts at a set temperature to confirm a surface has reached heat. It is a useful cross-check for forging and hardening, but it reads surface temperature only and cannot replace a thermocouple or oven.
Specifications
| Type | Melting-point crayon |
|---|---|
| Use | Confirm surface temperature |
| Range | About 40–1,000 °C by stick |
| Surface | Clean, scale-free steel |
| Reading | Mark melts and glosses |
| Limit | Surface only, not a soak |
Technical parameters
| Common ratings | 650 / 800 / 850 °C |
|---|---|
| Accuracy | About ± 1 % of rating |
| Application | Mark when cool or warm |
| Reading method | Visual melt point |
| Surface limit | Surface, not core |
| Interference | Scale and oil block the mark |
| Use case | Cross-check, not control |
| Shelf life | Long if kept clean |
Overview
A Tempilstik is a temperature-indicating crayon that melts at a specific rated temperature. You mark the steel with the crayon while it is cool or warm, then heat it; when the mark turns liquid and glossy, the steel has reached that temperature. In bladesmithing, Tempilstiks are used to confirm forging and heat-treat temperatures without relying on color, which is affected by ambient light and by your own eyes. They come in a wide range of rated temperatures, and you choose one to match a target, such as 800 degrees Celsius for an austenitizing check.
When choosing, pick the rated temperature to match the step you are checking and understand the limits. A Tempilstik indicates a surface threshold, not a soak, so it tells you when the surface reached temperature, not whether the core has equalized. It also only works on a clean surface; scale, oil, and coatings interfere with the mark. Reading color is unreliable in bright light or for people with reduced color vision, which is exactly where a crayon earns its place. The rated temperature is fixed per stick, so most smiths keep a few values on hand for different steels and steps.
In the workflow a Tempilstik is a cross-check, not a primary control. It is useful when you are learning to judge forging and hardening temperatures, when the shop lighting is poor, or when you want to confirm that an oven or forge is actually reaching the temperature it claims. It does not replace a thermocouple or a controlled oven for critical work, because it cannot hold a temperature or report how long the steel has been at heat. Used alongside color and a magnet, it helps a beginner build a reliable sense of temperature, and it is a quick way to sanity-check equipment.
Where it fits
This tool belongs to the Heat Treat stage of the build.
Safety
- Use tongs and gloves when marking hot steel, and keep the crayon away from the flame so it does not ignite or melt early.
- Do not rely on a Tempilstik alone for hardening; it confirms surface temperature only and cannot tell you the core is ready.
- Work in good ventilation, since some marking crayons give off fumes when they contact hot steel and burn off.
Using it well
- Mark a clean, scale-free spot so the crayon melts visibly; oil, scale, or coating stops the mark reading correctly.
- Use the crayon as a cross-check against color and a magnet, not as your only temperature reference during hardening.
- Keep a few rated temperatures on hand for different steels, and label them so you do not confuse the sticks.
- Remember the mark shows surface temperature; give the steel a moment for the core to catch up before quenching.
Compatible steels
Steels this tool is commonly used with, and which suit its working range.
Related processes
Related tools
Hardness Tester
Instrument that measures how hard a blade actually came out.
Magnet (Heat-Treat Reference)
Magnetic reference used to estimate the critical temperature of steel.
Hardy Tools
Stemmed tools that drop into the anvil hardy hole for shaping.
Polishing Wheel
Soft buffing wheel that brings steel to a mirror finish.
Further reading

How to Start Knife Making: A Beginner’s Guide
Knife making rewards patience more than tools. Here is the honest starting path: one simple steel, a handful of files, and the three skills that actually decide whether your first blade works.
Heat Treatment Explained: Quenching and Tempering
Hardening is a race between two transformations. Get the temperature and the quench right and the steel becomes martensite. Get them wrong and it stays soft. Here is the sequence that works, with real numbers.

Handle Assembly: Materials, Pins, and Finish
A handle is where the knife meets your hand and the part people notice first. This covers materials, tang prep, epoxy, pins and bolts, and the finishing steps that make it feel like one piece.