Hammers & Anvils · Shape
Cross-Peen Hammer
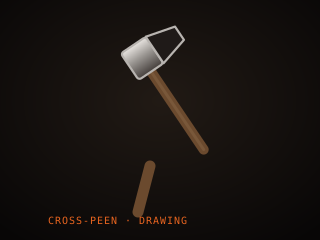
A cross-peen hammer has a flat face and a narrow wedge peen set across the handle. The peen concentrates force into a line, so it spreads and draws steel along a chosen axis, which makes it useful for setting tangs and blade profiles.
Specifications
| Head weight | 1–2.5 lb (0.45–1.1 kg) |
|---|---|
| Peen type | Cross-peen, across the handle |
| Faces | Flat plus wedge peen |
| Handle | Hickory, wedged |
| Peen edge | Rounded, polished |
| Use | Drawing, spreading, setting |
Technical parameters
| Head weight range | 0.45–1.1 kg |
|---|---|
| Peen angle | Wedge, 10–25° included |
| Face hardness | 50–58 HRC |
| Peen edge radius | 1–2 mm |
| Handle length | 300–350 mm |
| Peen width | 8–15 mm |
| Balance | Slightly peen-heavy |
| Stock spread per pass | 1–3 mm |
Overview
A cross-peen hammer carries a flat face on one end and a narrow, wedge-shaped peen set at right angles to the handle on the other. The peen concentrates the force of the blow into a line rather than a broad area, so it spreads and draws metal along the direction the peen is turned. That makes it the tool for stretching a blade lengthwise, setting the transition from blade to tang, and nudging a bend out of a forging. The flat face still does general work, so a cross-peen hammer is often the second hammer a smith reaches for.
Choosing one is about peen shape and balance. A cross-peen runs across the handle; a straight-peen runs along it; a diagonal-peen sits between the two. Each lets you direct the flow of metal differently, and the right one depends on the direction you want to move steel. The peen should be dressed smooth with a gently rounded edge, because a sharp peen edge leaves a crease that can become a crack. Head weight usually runs 1 to 2.5 pounds, and a hammer slightly lighter than your main forging hammer is easier to control for detail.
In the workflow the cross-peen hammer comes into play once the rough shape exists and you need to refine it. Where a flat hammer compresses and thins evenly, the peen draws the steel out along a chosen axis, which is how smiths stretch a blade without widening it. Used well, it saves grinding because it sets the profile closer to the final shape. Used carelessly, it leaves deep peen marks that have to be ground away, so beginners should practice on scrap and keep the peen edge smooth and the blows light.
Where it fits
This tool belongs to the Shape stage of the build.
Safety
- Wear eye protection; the narrow peen throws scale and can chip if it strikes a cold anvil edge or another tool.
- Keep the peen edge smooth and free of cracks, since a chipped peen can shed a sharp fragment under a hard blow.
- Aim the peen away from your body and the tong hand; a glancing peen blow can slide off the steel and swing back at you.
Using it well
- Turn the peen across the axis you want to stretch; a cross-peen draws steel at right angles to the wedge of the peen.
- Keep the peen edge rounded and polished; a sharp edge creases the steel and leaves marks that must be ground out later.
- Use light, accurate peen blows to set a tang or blade transition, then switch to the flat face to smooth the surface.
- Practice on mild steel scrap first, since the peen moves metal fast and mistakes are harder to correct than flat-hammer work.
Compatible steels
Steels this tool is commonly used with, and which suit its working range.
Related processes
Related tools
Anvil Stand
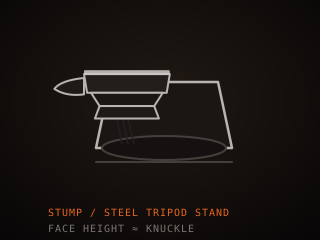
Rigid base that holds the anvil at working height and damps ring.
Sanding Belts
Abrasive belts in a grit progression for grinding and finishing.
Handle Epoxy
Two-part adhesive that bonds handle scales to the tang.
Blacksmith Tongs
Gripping tool for holding hot steel safely at the anvil and forge.
Further reading

How to Start Knife Making: A Beginner’s Guide
Knife making rewards patience more than tools. Here is the honest starting path: one simple steel, a handful of files, and the three skills that actually decide whether your first blade works.

Handle Assembly: Materials, Pins, and Finish
A handle is where the knife meets your hand and the part people notice first. This covers materials, tang prep, epoxy, pins and bolts, and the finishing steps that make it feel like one piece.

Making a Leather Sheath: Step by Step
A sheath is a fitted leather case made around the knife, not a pouch the knife is dropped into. This walks through the pattern, the welt, wet forming and the stitching that holds it together.