Handle & Finishing · Finish
Handle Epoxy
Handle epoxy is a two-part adhesive that bonds handle scales to the tang and seals the joint. Accurate mixing, clean surfaces, and a full cure decide whether the handle holds, and uncured epoxy can sensitize skin.
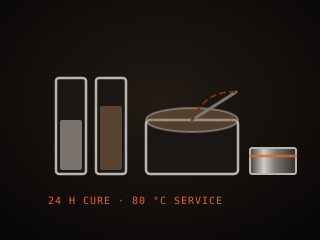
Specifications
| Type | Two-part epoxy resin |
|---|---|
| Mix | Resin and hardener, by ratio |
| Open time | 5–60 minutes by product |
| Cure | 12–24 hours typical |
| Use | Bond scales to the tang |
| Prep | Clean, roughened surfaces |
Technical parameters
| Mix ratio | 1:1 or 2:1 by volume |
|---|---|
| Open time | 5–60 minutes |
| Full cure | 12–24 hours |
| Gap filling | Good, cures hard |
| Heat resistance | Softens when hot |
| Bond strength | Strong with good prep |
| Cure temperature | Above 15 °C ideal |
| Clamp time | Until set, then cure |
Overview
Handle epoxy is a two-part adhesive that bonds handle scales to the tang and seals the joint against moisture. When mixed, the resin and hardener react and cure into a hard, durable plastic that fills gaps, holds the scales, and keeps water and blood out of the handle. It works alongside pins and tubes: the pins carry shear loads, and the epoxy carries the bond across the whole surface. A good epoxy has a workable open time, cures hard but not brittle, and resists heat and moisture. The bond is only as good as the surface prep and the mix ratio.
When choosing, look at open time, cure strength, and how it behaves at temperature. A slow-curing epoxy gives you more time to position and clamp the scales, while a fast one is convenient for small jobs but leaves little room to adjust. The cured joint should be strong but slightly flexible, so it does not crack when the handle flexes. Temperature matters at both ends: epoxy will not cure well in a cold shop, and it softens when the handle gets hot, which is why a hot blade or an aggressive buffer can loosen a poorly chosen glue. Measure the ratio accurately, because off-ratio mixes cure weak or not at all.
In the workflow epoxy is used at the moment of final assembly, after the blade is finished, the guard fitted, and the scales drilled and dry-fitted. The tang and scales are cleaned and often roughened so the glue can key into the surface, then epoxy is applied and the handle is clamped until the cure is complete. Excess glue is wiped or filed away before it fully hardens, because cured epoxy is far harder to remove than partly set glue. The joint is the last thing to be tested and the first thing to fail if it is rushed, so mix carefully, clamp evenly, and let it cure for the full time before grinding the handle.
Where it fits
This tool belongs to the Finish stage of the build.
Safety
- Wear nitrile gloves and avoid skin contact; epoxy resins and hardeners can cause contact dermatitis and sensitization.
- Work in a ventilated area, since uncured epoxy and its vapors can irritate skin, eyes, and airways.
- Do not get epoxy in your eyes or on broken skin, and wash hands thoroughly before eating or touching your face.
Using it well
- Measure the mix ratio accurately and stir for the full time; an off-ratio or poorly mixed batch cures weak or stays tacky.
- Roughen and clean the tang and scales before gluing, so the epoxy keys into the surface instead of sitting on top of it.
- Wipe or scrape excess glue while it is still partly soft, since fully cured epoxy is much harder to file off the blade.
- Clamp evenly and let the handle cure for the full time in a warm shop; rushing the cure is how joints fail later.
Compatible steels
Steels this tool is commonly used with, and which suit its working range.
Related processes
Related tools
Brass Guard
Metal fitting between blade and handle that protects the hand.
Handle Material
Scales, blocks, and slabs that form the grip of a finished knife.
Leather Sheath
Stitched leather pouch that carries and protects a finished knife.
Handle Pins
Metal rods that fasten and reinforce a knife handle.
Further reading

How to Start Knife Making: A Beginner’s Guide
Knife making rewards patience more than tools. Here is the honest starting path: one simple steel, a handful of files, and the three skills that actually decide whether your first blade works.

Handle Assembly: Materials, Pins, and Finish
A handle is where the knife meets your hand and the part people notice first. This covers materials, tang prep, epoxy, pins and bolts, and the finishing steps that make it feel like one piece.

Making a Leather Sheath: Step by Step
A sheath is a fitted leather case made around the knife, not a pouch the knife is dropped into. This walks through the pattern, the welt, wet forming and the stitching that holds it together.