Handle & Finishing · Finish
Handle Pins
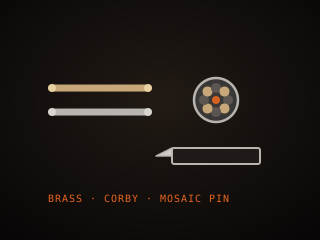
Handle pins are metal rods or tubes that pass through the tang and scales to reinforce a handle. They work with epoxy rather than instead of it, and a well-set pin ends flush, nearly invisible, and matched to the fittings.
Specifications
| Types | Solid pins or tubes |
|---|---|
| Material | Brass, stainless, nickel silver |
| Diameter | 3–6 mm |
| Function | Fasten and reinforce scales |
| Spacing | Even, 20–40 mm apart |
| Finish | Ground and sanded flush |
Technical parameters
| Pin diameter | 3–6 mm |
|---|---|
| Hole size | Match pin, snug fit |
| Pin count | 2–4 typical per handle |
| Peening | Light, to lock scales |
| Material | Brass, 304 stainless, nickel silver |
| Spacing | 20–40 mm apart |
| Tube wall | 1–2 mm |
| Finish | Flush, polished |
Overview
Handle pins are metal rods that pass through the tang and the handle material to hold the scales in place and add strength. They come as solid pins, often brass, stainless, or nickel silver, and as tubes, which are hollow and can be peened or left open to show the tang through the handle. Pins work with epoxy, not instead of it: the glue bonds the scales, and the pins resist shear and keep the handle from shifting under impact. Their size, spacing, and finish affect both the strength and the look of the handle, and a well-set pin is flush and nearly invisible.
When choosing, match the pin material and diameter to the handle and the look you want. Brass is traditional and easy to peen and polish; stainless is stronger and does not tarnish; nickel silver sits between the two in color and hardness. Pin diameter usually runs from about 3 to 6 millimeters, with larger pins for heavier handles. Spacing should be even and avoid the thin, unsupported areas of the tang. Tubes need to be cut square and can be countersunk and peened to lock the scales, while solid pins are simply cut, inserted, and ground flush. The pins should match the guard and bolsters for a unified look.
In the workflow pins are installed during handle assembly, after the scales are fitted and drilled and just before or during gluing. The holes must line up through the tang and both scales, which is easiest if the scales are drilled together with the tang in place. Pins are then glued and driven in, and once the epoxy cures the ends are ground and sanded flush with the handle. Peening the ends slightly expands them and locks the scales, but too much peening splits the handle material. A handle with well-set pins feels solid; proud, gappy, or misaligned pins are among the most visible flaws in a finished knife.
Where it fits
This tool belongs to the Finish stage of the build.
Safety
- Wear eye protection when drilling and grinding pins, since a spinning pin or drill can throw metal fragments.
- Clamp the handle when drilling so the bit cannot grab and spin the work into your hand.
- Deburr pin ends and avoid over-peening, which can split the handle material and send a sharp edge toward your fingers.
Using it well
- Drill the scales with the tang clamped between them, so the pin holes line up perfectly on the first try.
- Peen the pin ends lightly to lock the scales, but stop before the handle material starts to crack or split.
- Match pin material to the guard and bolsters; mismatched metals make an otherwise clean handle look assembled from spare parts.
- Cut pins slightly long, glue and seat them, then grind flush after the epoxy cures so the ends sit perfectly flat.
Compatible steels
Steels this tool is commonly used with, and which suit its working range.
Related processes
Related tools
Leather Sheath
Stitched leather pouch that carries and protects a finished knife.
Brass Guard
Metal fitting between blade and handle that protects the hand.
Handle Epoxy
Two-part adhesive that bonds handle scales to the tang.
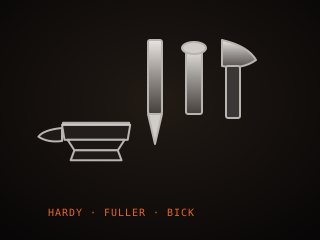
Hardy Tools
Stemmed tools that drop into the anvil hardy hole for shaping.
Further reading

How to Start Knife Making: A Beginner’s Guide
Knife making rewards patience more than tools. Here is the honest starting path: one simple steel, a handful of files, and the three skills that actually decide whether your first blade works.

Handle Assembly: Materials, Pins, and Finish
A handle is where the knife meets your hand and the part people notice first. This covers materials, tang prep, epoxy, pins and bolts, and the finishing steps that make it feel like one piece.

Making a Leather Sheath: Step by Step
A sheath is a fitted leather case made around the knife, not a pouch the knife is dropped into. This walks through the pattern, the welt, wet forming and the stitching that holds it together.