Handle & Finishing · Finish
Leather Sheath
A leather sheath is a stitched pouch that carries and protects a finished knife. Vegetable-tanned leather wet-forms around the blade, and a welt along the cutting edge keeps the blade from slicing the stitches.
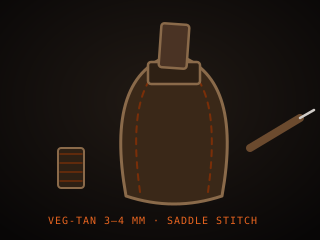
Specifications
| Material | Vegetable-tanned leather |
|---|---|
| Weight | 6–10 oz by knife size |
| Construction | Pouch, fold-over, or belt |
| Stitch | Hand saddle or machine |
| Welt | Between layers at the edge |
| Finish | Edge burnished and sealed |
Technical parameters
| Leather weight | 6–10 oz |
|---|---|
| Thickness | 2.5–4 mm |
| Stitch spacing | 4–6 mm |
| Thread | Waxed polyester or linen |
| Welt width | 8–12 mm |
| Forming | Wet-molded to the knife |
| Finish | Dye, wax, or sealant |
| Tanning | Vegetable, not chrome |
Overview
A leather sheath is a stitched pouch that carries and protects a finished knife. In bladesmithing it is the last thing made, after the blade is ground, heat treated, sharpened, and handled. Sheaths are usually built from vegetable-tanned leather, which is firm, takes wet-forming well, and does not corrode steel the way chrome-tanned leather can. The leather is cut to a pattern, wet-molded around the knife, stitched, and finished with edge dressing and a sealant. A good sheath holds the knife securely, covers the edge, and lets you draw and return the blade without fumbling.
When choosing, think about carry style, leather weight, and construction. A pouch or belt sheath protects the whole blade, while a simple fold-over or Scandinavian-style sheath is lighter and faster to make. Leather weight is measured in ounces: around 6 to 8 ounces suits a folding or small knife, while 8 to 10 ounces and up gives a stiff, durable belt sheath for a larger blade. Stitching can be by hand with a saddle stitch, or by machine. The welt, a strip of leather between the layers along the cutting edge, is what stops the blade from slicing the stitches, and it is not optional on a working sheath.
In the workflow the sheath is the finishing touch and the proof that the knife is complete. It is made after the knife is fully finished, because the sheath is wet-formed around the actual blade and handle; any later change means remaking the sheath. Wet-forming takes patience: the leather is dampened, pressed around the knife, and left to dry, with the blade protected from moisture. The finished sheath is stitched, burnished, and sealed, and it should hold the knife firmly but still release easily. A well-made sheath protects both the edge and the user, and it turns a blade into a carried tool.
Where it fits
This tool belongs to the Finish stage of the build.
Safety
- Keep fingers behind the needle and awl when stitching; a sharp awl slips easily and punctures hands.
- Cut leather on a mat with a sharp blade and cut away from your body, since dull blades force you to press and slip.
- Ventilate when dyeing and sealing leather, as the solvents in finishes give off fumes that are harmful to breathe.
Using it well
- Make the pattern from the finished knife, not the design, so the sheath fits the actual blade and handle you built.
- Always build in a welt along the cutting edge; without it the blade slices the stitches and the sheath falls apart.
- Wet-form the leather around a plastic-wrapped knife so the steel stays dry, then let it dry fully before stitching.
- Test the fit with the knife sheathed and drawn several times before sealing, so you can adjust while the leather is workable.
Compatible steels
Steels this tool is commonly used with, and which suit its working range.
Related processes
Related tools
Handle Pins
Metal rods that fasten and reinforce a knife handle.
Brass Guard
Metal fitting between blade and handle that protects the hand.
Handle Epoxy
Two-part adhesive that bonds handle scales to the tang.
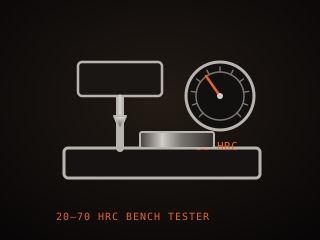
Hardness Tester
Instrument that measures how hard a blade actually came out.
Further reading

How to Start Knife Making: A Beginner’s Guide
Knife making rewards patience more than tools. Here is the honest starting path: one simple steel, a handful of files, and the three skills that actually decide whether your first blade works.

Handle Assembly: Materials, Pins, and Finish
A handle is where the knife meets your hand and the part people notice first. This covers materials, tang prep, epoxy, pins and bolts, and the finishing steps that make it feel like one piece.

Making a Leather Sheath: Step by Step
A sheath is a fitted leather case made around the knife, not a pouch the knife is dropped into. This walks through the pattern, the welt, wet forming and the stitching that holds it together.