Grinding & Shaping · Grind
Whetstones
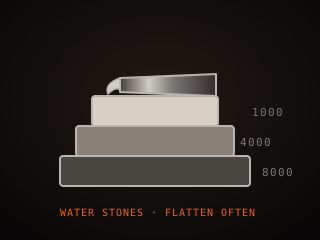
Whetstones sharpen and polish an edge by grinding the bevels to a clean apex. Water stones cut fast and dish easily, oil stones hold flat but cut slower, and diamond plates handle hard, wear-resistant steels.
Specifications
| Type | Water stone or oil stone |
|---|---|
| Grit range | 120–8,000+ |
| Flattening | Regular, on diamond plate |
| Lubricant | Water or thin oil |
| Use | Sharpening and polishing edges |
| Set | Coarse, medium, fine progression |
Technical parameters
| Grit range | 120–8,000 |
|---|---|
| Common grits | 400 / 1,000 / 3,000 / 6,000 |
| Dishing | Water stones dish faster |
| Diamond plates | For flattening and hard steels |
| Sharpening angle | 15–25° per side |
| Apex width | Under 1 micron ideal |
| Lubricant | Water soak or light oil |
| Stone size | 150–200 mm typical |
Overview
A whetstone is an abrasive block used to sharpen and polish an edge. Stones work by grinding away steel along the bevel until the two bevels meet in a clean apex. They come in two broad families: water stones, which are softer, cut fast, and are soaked or splashed before use, and oil stones, which are harder, slower, and used with a thin oil that carries away swarf. Grit is the main variable, from a coarse 220 for resetting a bevel through 1,000 for sharpening to 6,000 or finer for polishing. Synthetic stones have consistent grit; natural stones vary but can leave a distinctive finish.
When choosing, decide on the grit progression and the stone type that suits your steel and patience. A simple set of 400, 1,000, and 3,000 to 6,000 covers most knife sharpening, while a coarse 120 to 220 stone is for repairs. Water stones dish, meaning they wear unevenly and go hollow, so they need regular flattening on a diamond plate or a flat reference surface. Oil stones hold their flatness longer but cut more slowly. Hard, wear-resistant steels such as D2 and high-vanadium alloys respond better to diamond stones, which cut any hardness without dishing as quickly.
In the workflow whetstones belong at the very end, after heat treatment and handle fitting, when the blade is finished and only needs an edge. They give the finest control over the apex and the cleanest, most durable edge for most users. The discipline is consistency: keep the same angle on every stroke, keep the stone flat, and progress through the grits without skipping. A sharpening system that holds the angle helps beginners, but freehand sharpening is faster once you can feel the bevel sit flat. A stone is also a maintenance tool, since a blade dulled in use can be brought back on a fine stone alone.
Where it fits
This tool belongs to the Grind stage of the build.
Safety
- Wash hands and the stone after sharpening; metal swarf and stone slurry on skin can irritate and are easily transferred to eyes.
- Keep fingers behind the edge and use a stone holder or non-slip base, since a wet, sliding stone invites a serious cut.
- Flatten a dished stone before use, because a hollow stone rounds the bevel and can make the edge catch and slip.
Using it well
- Flatten water stones on a diamond plate before each session; a dished stone cannot cut a flat bevel no matter how careful you are.
- Lock your wrists and move from the shoulder to hold a consistent angle; a steady 20° beats a wandering 15° every time.
- Soak water stones until bubbles stop, and keep them wet during use, since a dry stone glazes and stops cutting.
- Finish on a fine stone and strop lightly; the polished apex cuts longer than a coarser, toothier edge for most utility work.
Compatible steels
Steels this tool is commonly used with, and which suit its working range.
Related processes
Related tools
Metal Files
Hand-cutting tools for shaping steel and refining bevels.
Sanding Belts
Abrasive belts in a grit progression for grinding and finishing.
Polishing Wheel
Soft buffing wheel that brings steel to a mirror finish.
Forge Burner
Mixes fuel and air to produce the flame that heats a forge chamber.
Further reading

How to Start Knife Making: A Beginner’s Guide
Knife making rewards patience more than tools. Here is the honest starting path: one simple steel, a handful of files, and the three skills that actually decide whether your first blade works.

Handle Assembly: Materials, Pins, and Finish
A handle is where the knife meets your hand and the part people notice first. This covers materials, tang prep, epoxy, pins and bolts, and the finishing steps that make it feel like one piece.

Making a Leather Sheath: Step by Step
A sheath is a fitted leather case made around the knife, not a pouch the knife is dropped into. This walks through the pattern, the welt, wet forming and the stitching that holds it together.