Forge & Heating · Forge
Fire Bricks
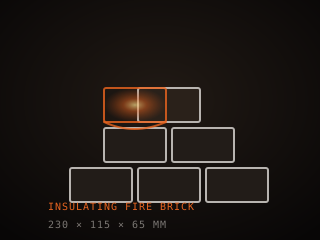
Fire bricks are refractory blocks that line and insulate a forge chamber and shape its openings. Dense bricks resist flux and abuse, while light insulating bricks hold heat far better but are fragile and easily damaged.
Specifications
| Type | Dense or insulating (soft) |
|---|---|
| Rating | 1,260–1,430 °C class |
| Standard size | 230 × 114 × 64 mm |
| Density | Soft ~0.5, dense ~2.2 g/cm³ |
| Placement | Floor dense, walls and roof soft |
| Cutting | Masonry saw or hand saw |
Technical parameters
| Max service temp | 1,260–1,430 °C / 2,300–2,600 °F |
|---|---|
| Thermal conductivity | Soft 0.15–0.3 W/m·K |
| Density | 0.4–2.4 g/cm³ |
| Cold crushing strength | Soft low, dense high |
| Thermal expansion | Low, resists cycling |
| Flux resistance | Dense good, soft poor |
| Porosity | Soft high, dense low |
| Reuse life | Months to years by duty |
Overview
Fire bricks are refractory blocks made to survive direct flame and repeated thermal cycling. In a forge they do two jobs: they insulate the chamber so heat stays where the steel is, and they shape the opening so you can block unused doors or build up a smaller hot zone. There are two broad families. Dense fire bricks are heavy, hard, and resistant to flux and mechanical damage but conduct heat away quickly. Insulating fire bricks, often called soft bricks, are light and porous, hold heat far better, and heat up fast, but they are fragile and easily gouged.
When choosing, match the brick to the job. Soft insulating bricks are the right call for the roof and walls of a gas forge because they keep the chamber hot with less fuel. Dense bricks belong on the floor, at the door, and anywhere hot flux or tongs will scrape. Check the temperature rating against the peak of your forge, and remember that flux used in forge welding dissolves many refractories, so a sacrificial coating or a dense floor brick saves the lining. Cutting bricks with a masonry saw creates a lot of fine dust, so plan for that.
In the workflow, fire bricks are the cheap, adjustable part of the forge you will rearrange constantly. A stack of soft bricks can turn a large chamber into a small one for a delicate operation, or close one end to send more heat to the blade. Over time they crack, spall, and get glazed by flux, and you simply rotate or replace them. Because they are modular, they let a beginner build a serviceable forge from a simple shell, and they let an experienced smith fine-tune the chamber without rebuilding it.
Where it fits
This tool belongs to the Forge stage of the build.
Safety
- Cut and shape fire bricks outdoors or with extraction, and wear a respirator; refractory dust is a fine silica and fiber hazard.
- Wear gloves when handling bricks, since soft bricks crumble at the edges and dense bricks have sharp, abrasive corners.
- Do not soak or quench hot bricks; thermal shock cracks them and can throw fragments while they are still hot.
Using it well
- Use soft insulating bricks for walls and roof, and reserve dense bricks for the floor where tongs, steel, and flux will punish the surface.
- Coat soft brick surfaces with a thin refractory wash or a hard facing where flux lands, so welding flux does not eat the lining.
- Keep spare bricks on hand and rotate them; a cracked brick still insulates, but a glazed or flux-eaten one should be swapped out.
- Cut bricks slightly oversize and tap them into place; a tight fit holds heat better and stops the lining shifting as the forge heats.
Compatible steels
Steels this tool is commonly used with, and which suit its working range.
Related processes
Related tools
Coal Forge
Solid-fuel hearth that burns coal or coke for traditional forging.
Forge Burner
Mixes fuel and air to produce the flame that heats a forge chamber.
Sanding Belts
Abrasive belts in a grit progression for grinding and finishing.
Handle Material
Scales, blocks, and slabs that form the grip of a finished knife.
Further reading

How to Start Knife Making: A Beginner’s Guide
Knife making rewards patience more than tools. Here is the honest starting path: one simple steel, a handful of files, and the three skills that actually decide whether your first blade works.

Handle Assembly: Materials, Pins, and Finish
A handle is where the knife meets your hand and the part people notice first. This covers materials, tang prep, epoxy, pins and bolts, and the finishing steps that make it feel like one piece.

Making a Leather Sheath: Step by Step
A sheath is a fitted leather case made around the knife, not a pouch the knife is dropped into. This walks through the pattern, the welt, wet forming and the stitching that holds it together.