The forge itself is the least important purchase in a home shop. A modest gas forge with a good burner in a well-ventilated spot will teach you more than an expensive one wedged into the corner of a garage with the door shut. Where it goes, how the air moves, and how far you have to walk to the anvil decide whether you enjoy forging or dread it.
This is a setup guide for a small space: a single garage bay, a shed, or a covered corner of a yard. The goal is a shop where the hot work happens in one direction, the dirty work in another, and the walking between them is short enough that your steel is still hot when you get there. Set it up once with those three ideas in mind and the shop will work for years.
Choosing the location and getting the air right
Site the forge outdoors or in a space with openings on two opposite sides, so air moves through rather than around. Put the forge near the outlet side so exhaust leaves, and keep yourself on the inlet side so you are breathing fresh air. If the only option is a garage, use the main door as your outlet, open a second door or window behind you as the inlet, and never run the forge with the space closed up.
Think about what surrounds the forge before you light it. Above: is there anything overhead that will get hot, like a shelf, a plastic roof panel or a low ceiling? To the sides: is there anything within a meter that could catch a spark, like a woodpile, a fuel can or a bag of sawdust? Below: is the floor concrete, or something that can burn? Concrete is the right answer, and a concrete pad outdoors is better still.
- Openings on two opposite sides, with the forge near the outlet so exhaust leaves the space.
- A concrete floor or a paved outdoor area. Never set a forge on a wooden floor or a bench.
- At least a meter of clear space on every side, and nothing combustible overhead.
- The quench tank within a step or two, but not so close that sparks can reach it.
- A clear walking path to the anvil so you are not carrying hot steel around obstacles.
Gas or coal
Gas is the sensible choice for most home shops. It is clean, it lights in seconds, it holds a steady temperature, and it produces no clinker or ash. A single-burner forge with a properly sized orifice will reach forging temperatures and harden a knife, and a two-burner version handles longer blades. The trade-off is that a gas forge is a more oxidizing environment unless you tune it, so scale and decarburization are always present to some degree.
Coal is traditional, cheaper to run in some regions, and gives you a reducing fire that keeps scale down. It also produces smoke, sulphur and clinker, needs a real flue or full outdoor siting, and takes twenty minutes to come up to heat. For a hobbyist in a residential area, gas is almost always the better choice. If you do burn coal, buy smithing coal from a supplier who sells it for forging rather than domestic fuel, because the wrong coal will not coke properly and will smoke relentlessly.
| Gas forge | Coal forge | |
|---|---|---|
| Startup time | 1–2 minutes | 15–25 minutes |
| Smoke and smell | Minimal when tuned | Significant, especially at startup |
| Temperature control | Easy and adjustable | Requires constant attention |
| Fuel storage | Propane cylinder | Bulk coal, kept dry |
| Ash and clinker | None | Yes, dug out of the fire |
| Best for | Small shops, suburbs | Rural shops with real ventilation |
The anvil and its stand
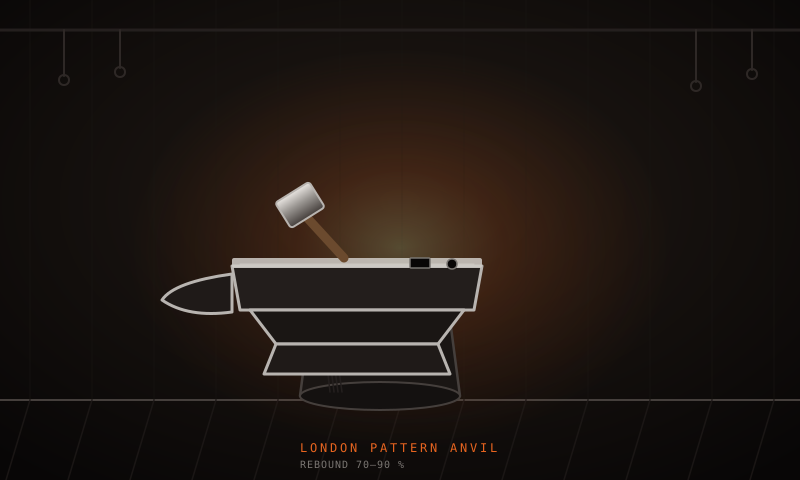
An anvil does not have to be an expensive traditional pattern. A piece of heavy steel plate, a length of rail, or a solid block of mild steel will all work, and some of them work better than a cheap cast anvil with a soft face. What matters is mass under the hammer and a flat, reasonably hard top surface. A light anvil that bounces and rings will waste your effort and hurt your ears.
Set the working height so the top face is at about knuckle height when you stand relaxed. That is the height at which your hammer lands flat without you bending or reaching. Mount it on a heavy stand: a hardwood stump, a steel drum filled with sand, or a fabricated stand weighted at the base. Secure the anvil to the stand with chain or straps, and if it rings, put a magnet or a chain under the heel to quiet it.
- Top face at about knuckle height, so your hammer lands flat with a relaxed arm.
- Mass matters more than brand. A heavy steel block beats a light, hollow cast anvil.
- Secure the anvil to the stand so it does not walk or bounce during heavy work.
- Quiet a ringing anvil with a magnet or a loose chain wrapped under the heel.
- Set the stand on a concrete floor, not a wooden deck that will flex and transmit noise.
Hammers, tongs and the basic tool kit
You need fewer tools than the internet suggests. One hammer around 800 g to 1 kg with a dressed face, one lighter hammer for detail, two pairs of tongs sized to your stock, a hot cut, and a set of files. That will forge a knife. Everything else is refinement, and buying refinement before you can use the basics is how shops fill up with unused tools.
Buy tongs in the sizes you actually use rather than one universal pair. Tongs that do not grip securely let the steel rotate under the hammer, which is both frustrating and dangerous because hot steel gets dropped. If you can only afford two pairs, get one for square stock and one for flat bar, and make sure they close properly on the bar you are actually forging.
| Tool | Size or type | Why you need it |
|---|---|---|
| Hammer | 800 g – 1 kg, flat face | Main shaping and drawing out |
| Light hammer | 400–600 g | Detail work, straightening, shoulders |
| Tongs | Square and flat jaw | A secure grip on your actual stock size |
| Hot cut | Hardy or handled | Cutting hot steel without a hacksaw |
| Files | Flat, half-round, needle set | Shaping and cleaning up the profile |
The quench tank and the tempering setup
The quench tank needs to be metal, deep enough to submerge your longest blade, and wide enough that you can move the blade around without hitting the sides. A length of steel pipe capped at one end works well for long blades, and a deep metal pan works for short ones. Fill it with enough fast-quenching oil that the blade is fully covered with room around it, and fit a lid you can drop on from a distance.
Tempering needs a separate, gentler heat source: a toaster oven, a small kiln, or a dedicated tempering oven that holds a steady low temperature. Accuracy matters here, because the difference between 200 °C and 230 °C is the difference between a hard edge and a slightly tougher one. A cheap oven with a dial is often off by twenty degrees, so check it against a known thermometer before you trust it with a blade.
Layout, storage and a shop that stays usable
A shop layout is a workflow. Steel comes in, gets cut and forged at the forge and anvil, gets normalized and hardened at the quench and oven, then gets ground, then gets handled and finished. If those stations are in a sensible order and close together, you will work more and walk less. If the grinder is behind the forge, you will grind metal dust into your fire area and drag hot steel past your fuel supply.
Keep the dirty, spark-producing work away from the hot work and the clean finishing work. Grinding dust and forge scale should not land on the bench where you glue up handles, and sparks should never reach the quench oil or the propane line. Store propane outdoors, keep coal dry and away from the building, and put a clear, non-flammable surface within arm’s reach of every station for setting down hot steel.
- Arrange stations in workflow order: cut, forge, normalize, quench, temper, grind, finish.
- Keep grinding and sparks physically separated from the forge, the fuel and the quench oil.
- Keep handle work and glue-up away from dust and scale. Contamination ruins finishes.
- Store propane outside, upright and away from heat, with the valve closed.
- Have a clearly marked, non-flammable spot to set down hot steel at every station.
Site the forge first
Everything else arranges itself around the forge. Choose the spot for ventilation, clear space and a non-flammable floor before you decide where anything else goes.
Place the anvil within a step or two
Close enough that you can carry hot steel to it without a long walk, and far enough that you have room to swing a hammer without hitting anything.
Put the quench tank on the path
Between the forge and the anvil, so a hot blade goes from fire to oil without crossing the shop. Keep it clear of anything flammable.
Separate the grinding station
As far from the forge, the fuel and the quench oil as the space allows, with its own dust control and its own extinguisher.
Finish with the clean bench
Handle work, glue-up and sharpening go in the cleanest corner, away from dust and scale, where contamination cannot reach them.
Key takeaways
- Ventilation decides whether your shop is usable. Openings on two opposite sides, forge near the outlet, never a closed garage.
- Gas is the practical choice for most home shops. Coal needs real ventilation, a flue and twenty minutes to come up to heat.
- An anvil is mass plus a flat top at knuckle height. A heavy steel block on a weighted stand beats a light cast anvil.
- One hammer near 800 g–1 kg, tongs sized to your stock and a few files will forge a knife. Buy the rest later.
- Lay the shop out in workflow order and keep sparks, oil, propane and clean finishing work separated from each other.
Frequently asked
A single garage bay or a covered outdoor area of roughly three by four meters is plenty. You need room for the forge, an anvil with space to swing a hammer, a quench tank, a tempering oven and a bench. Outdoor space works better than indoor space for most people, because ventilation is free and you are not fighting carbon monoxide.
Only if the shed has genuine through-ventilation, meaning openings on two opposite sides with air moving between them. A small shed with a single door is one of the worst places to run a forge, because carbon monoxide collects in a small volume very quickly. Forge outside and use the shed for storage, or fit proper ventilation and a CO alarm.
A gas forge, an anvil or a heavy steel block, one hammer around 800 g to 1 kg, one pair of tongs that grips your stock, a tank for quench oil, and files. Add a tempering oven before you harden your first blade, because a blade that is quenched and not tempered is brittle and unsafe.
Related articles
Forging Basics: Heating, Hammering, and Shaping
Forging is not about hitting hard. It is about heat, hammer control and knowing when to stop. This covers the working temperatures, the hammer work, and the faults that show up in every beginner blade.

Bladesmithing Safety: Heat, Dust, and PPE
The forge, the grinder and the quench tank each have their own way of hurting you. This is what actually goes wrong in a knife shop, and the specific habits that stop it happening to you.
How to Start Knife Making: A Beginner’s Guide
Knife making rewards patience more than tools. Here is the honest starting path: one simple steel, a handful of files, and the three skills that actually decide whether your first blade works.